Amazon AWS
Deploy VM
Deploy VyOS on Amazon AWS.
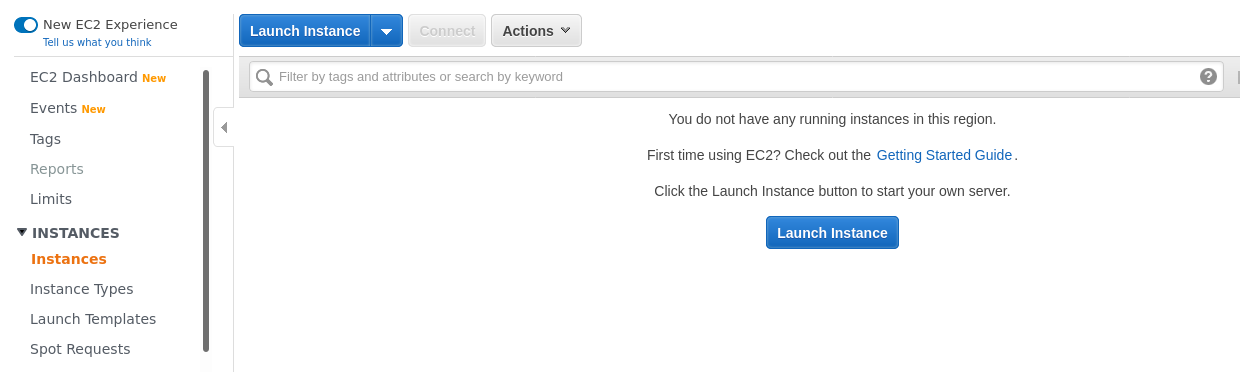
Click Instances and then click Launch Instance.
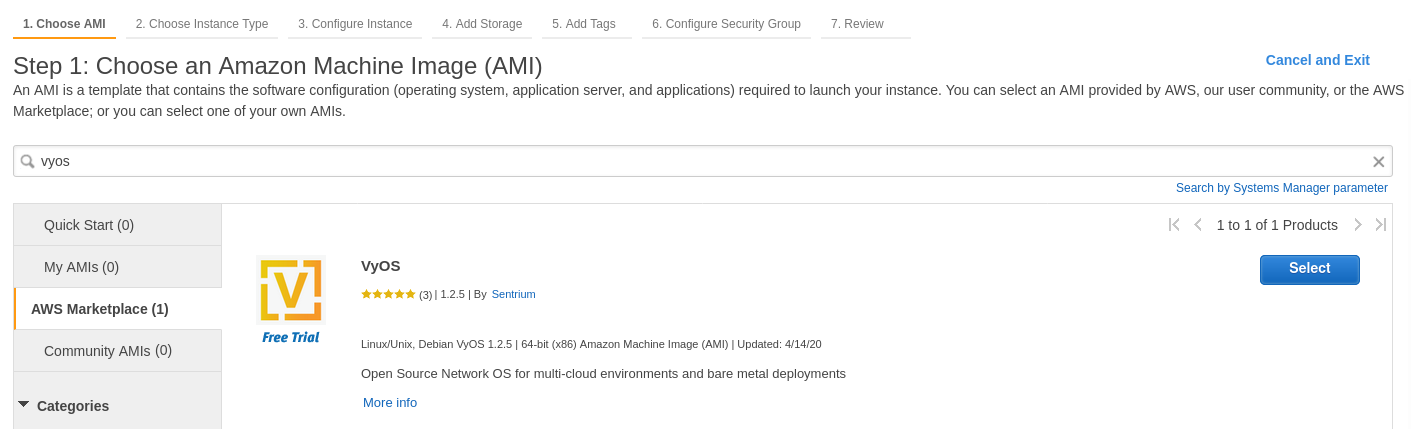
Search for “VyOS” in the Marketplace.
Choose the instance type. The recommended minimum is
m3.medium.

Configure the instance for your requirements. Select the number of instances, network, and subnet.

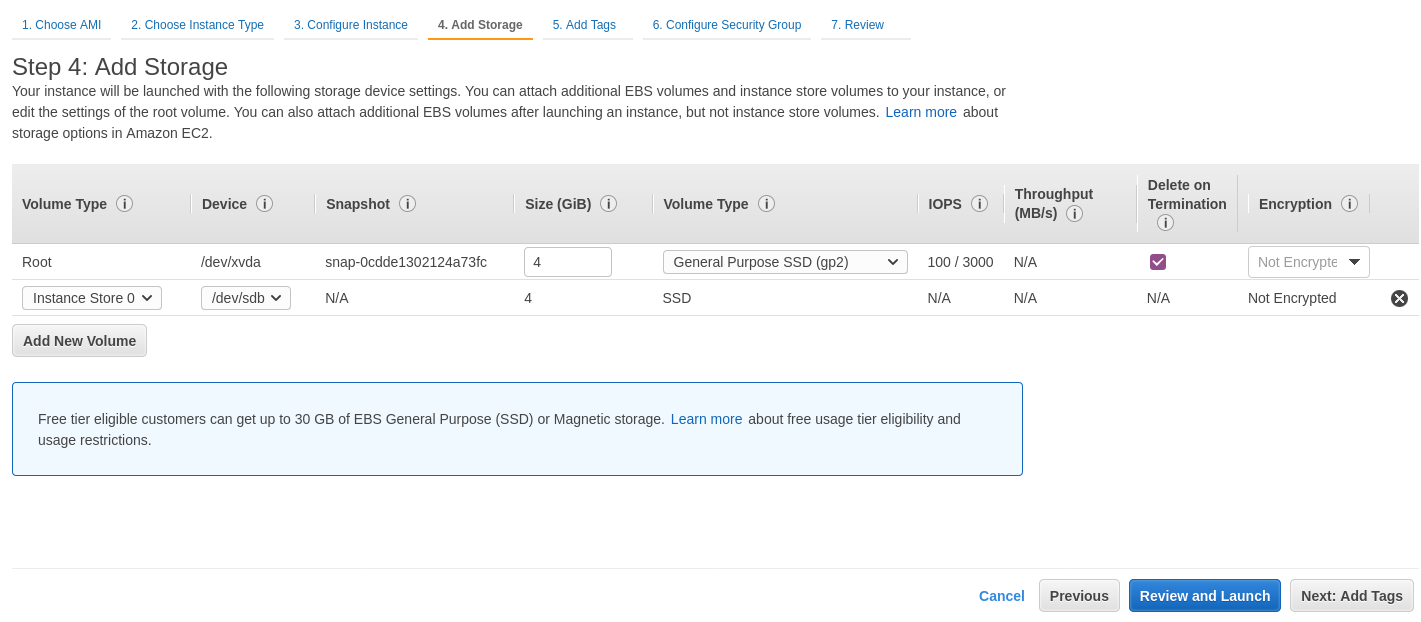
Configure additional storage. You can remove the additional storage
/dev/sdb. The root device will be/dev/xvda. You can skip this step.
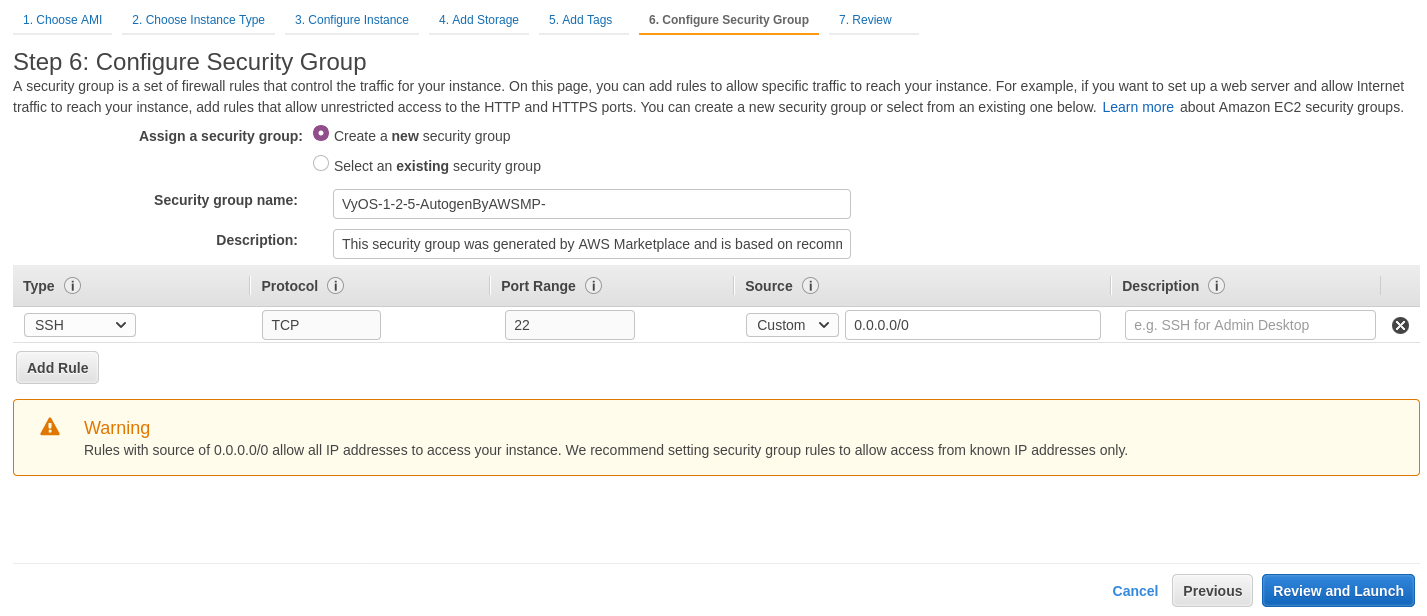
Configure the security group. We recommend configuring SSH access only from specific sources, or you can permit any IP address (the default).
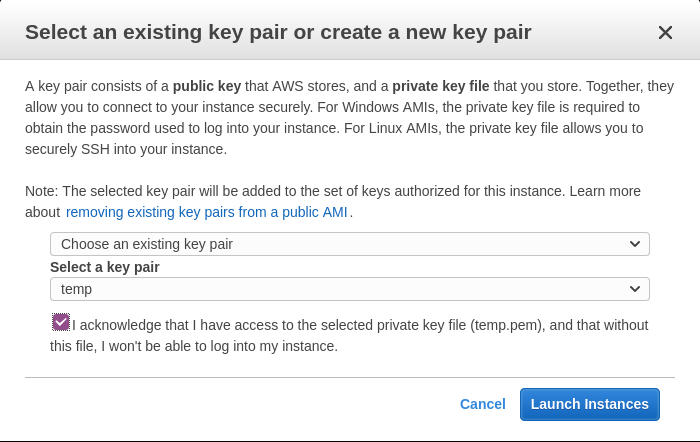
Select the SSH key pair and click Launch Instances.
Note your public IP address.

Connect to the instance using your SSH key.
ssh -i ~/.ssh/amazon.pem vyos@203.0.113.3
vyos@ip-192-0-2-10:~$
Amazon CloudWatch Agent Usage
To use the Amazon CloudWatch agent, configure it in the Amazon Systems Manager Parameter Store. For instructions on creating a configuration, see CloudWatch SSM Configuration creation.
Create an IAM role for the EC2 instance to access CloudWatch service, and name it CloudWatchAgentServerRole. The role should contain two default policies:
CloudWatchAgentServerPolicyandAmazonSSMManagedInstanceCore.Attach the created role to your VyOS EC2 instance.
Ensure the amazon-cloudwatch-agent package is installed.
$ sudo apt list --installed | grep amazon-cloudwatch-agentNote
The amazon-cloudwatch-agent package is normally included in VyOS 1.3.3+ and 1.4+
Retrieve an existing CloudWatch Agent configuration from the SSM Parameter Store.
$ sudo /opt/aws/amazon-cloudwatch-agent/bin/amazon-cloudwatch-agent-ctl -a fetch-config -m ec2 -s -c ssm:<your-configuration-name>This step also enables systemd service and runs it.
Note
The VyOS platform-specific scripts feature is under development. Thus, this step should be repeated manually after changing system image (Update VyOS)
CloudWatch SSM Configuration creation
Creating the Amazon Cloudwatch Agent Configuration in Amazon SSM Parameter Store.
Create an IAM role for your EC2 instance to access the CloudWatch service. Name it
CloudWatchAgentAdminRole. The role must contain at least two policies:CloudWatchAgentAdminPolicyandAmazonSSMManagedInstanceCore.
Note
CloudWatchAgentServerRole is too permissive and should be used only for creating and deploying a single configuration. After step 3, we recommend replacing the
CloudWatchAgentAdminRolewith theCloudWatchAgentServerRole.
Run the CloudWatch configuration wizard.
$ sudo /opt/aws/amazon-cloudwatch-agent/bin/amazon-cloudwatch-agent-config-wizard
When prompted, enter “yes” to the question “Do you want to store the config in the SSM parameter store?”.
AWS Gateway Load Balancer
VyOS supports the AWS Gateway Load Balancer (GWLB) tunnel handler (gwlbtun),
which enables VyOS to act as an inspection or processing target for GWLB. GWLB
uses Geneve encapsulation with custom metadata to deliver traffic to VyOS for
packet filtering, shaping, deep packet inspection, NAT, or other traffic
manipulation functions. The tunnel handler automatically creates Linux tunnel
interfaces (gwi-* for ingress and gwo-* for egress) per endpoint,
allowing you to use standard Linux utilities like iptables, tc, and netfilter
to implement your inspection or processing logic. This enables VyOS to serve as
a centralized appliance for traffic inspection in your AWS infrastructure,
supporting both single-endpoint (1-arm) and multi-endpoint (2-arm) deployment
modes.
For more information about integrating with AWS Gateway Load Balancer, see the following article from AWS: How to integrate Linux instances with AWS Gateway Load Balancer.
Configuration Example
Configure the AWS GWLB service with the following commands:
set service aws glb script on-create '/config/scripts/glb-create.sh'
set service aws glb script on-destroy '/config/scripts/glb-destroy.sh'
set service aws glb status format 'simple'
set service aws glb status port '8282'
set service aws glb threads tunnel '4'
set service aws glb threads tunnel-affinity '1-2'
set service aws glb threads udp '4'
set service aws glb threads udp-affinity '0-3'